

(photo courtesy of Moncy3 on Etsy)
If you know anything about me at all then you know two things; one, I can never pass up a pretty paper project and two, I absolutely cannot resist a good bargain! That's why these gorgeous little handmade envelopes just make me smile from ear to ear.
You can use them in so many creative ways, and what's more, you can pick out the most stunning paper tailored to match whatever style fits your fancy! From guest books, to favors, to escort cards the possibilities are endless! Stay tuned for a bit of inspiration below, but first, here's how you make them . . .
Tiny Envelope Tutorial
Supplies You Will Need:
~ decorative scrapbook or origami paper
~ sample envelope in the size you would like
~ bowl of lukewarm water
~ cardboard (to use as template)
~ pen
~ glue stick or glue tape roller
~ scissors

1. Choose an envelope you already have that you like the size and shape of
2. Soak it in a bowl of water (lukewarm is best) for about one minute, or until the glue releases from the paper easily. It will not take as long as you think!
3. Pat the now unfolded envelope dry - it doesn't have to be completely dry, just not drippy - and trace it onto a thin piece of cardboard - chipboard works well, as would something like a cereal box. Try to be accurate at this stage and trace neatly.

4. Cut the template out with a pair of scissors, and you may want to label it so that in the future you (or whoever you live with) won't say "what is this strange piece of cardboard?" and toss it out!
5. Use your new wonderful template to trace out an envelope design on any and all types of paper! Think gift wrap, maps, magazines, old calenders, stamped cardstock - you name it! I like to trace using pencil on the side that will be the inside so the marks won't show.


6. Carefully cut out your envelope with scissors and fold it up - I like to do the sides first, then use the folded sides as a guide on where to fold the top and bottom. Use the handle of your scissors or a bone folder for really crisp edges.
7. Use a glue tape roller to stick your envelope together, or glue stick but I find glue stick gets brittle after just a few months, go ahead and get a glue tape roller, they're like $5 and you can find them in the adhesive section of an office supply store or craft store.
8. *Bonus Points* if you've ever wanted to be able to lick and stick your envelope flaps, check out this Lick & Stick glue!
Tutorial Courtesy of Poppytalk
And in case you are in need of a bit more motivation, how about a guest book?


Or even escort cards . . .

Favors would be nice . . .


Perhaps you have a talent for watercolor . . .


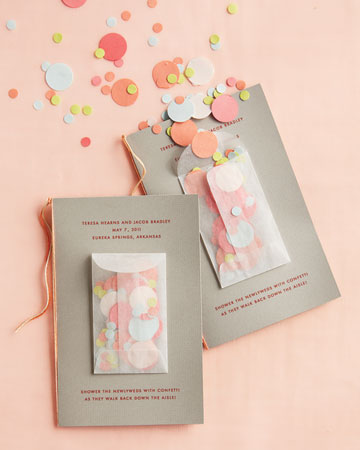
Or would like to get your confetti primed for tossing . . .
Make a map of it . . .


Save-the-Dates!

And a Bridesmaid Instruction Manual . . .

And I just love the thought of a budget friendly favor to send your guests home with; honor a loved one who is no longer with you by sharing a special recipe!

You can even make them 'top secret' to make everyone feel super special . . .

More pretties . . .


And a few from Kumosgreetings on Etsy


Aha, I knew you'd spot that chevron I snuck in there! And if you haven't been feeling quite bold enough, mini-envelopes are the perfect place to add a splash of color or print to your big day without going overboard! Best yet, all you need is some pretty paper & glue, so you can add a thoughtful little touch of personality without even breaking the bank!!

wow these are so beautiful..that's what i want to design Gift Card envelopes same like that.
ReplyDelete