If you are not redirected in five seconds, click here.

Showing posts with label woodland wedding. Show all posts

Friday, December 9, 2011

DIY Decorations: A Crafty Christmas

I am so excited to bring you a few amazing little holiday decorating projects today, just in case you have deemed this weekend as the one to decorate your digs or you need a bit more festive flair to really get yourself in the spirit!

And what's even better is that most of these DIY gems involve little more than spare materials & odds and ends you may have lying around the house already!  Take a look . . .


YARN GARLAND
Supplies You Will Need:

• a friend
• a few balls of yarn
• scissors


How to:

Step 1. Stand 5 feet away from your friend with yarn ball in hand, and hold on tight to the end strand of the yarn. Toss the yarn to your friend and pull both your ends so the length between you is taut. Have your friend hold on to their end and throw the ball back to you. Repeat these steps until you have10-20 tight strands between the two of you. Cut the end of your yarn to cut it away from the yarn ball.

Step 2. Still holding the string tight between the two of you, both of you should begin twisting the string in opposite directions until it is twisted tight. Be sure to not let go of your ends.


Walk towards one another, so that the two ends of yarn meet in the middle. They naturally will twist in the middle to create a neat braided look. Take a small piece of yarn and tie a tight knot around the combined ends so the twisting doesn’t come undone.

Make more of these in varying colors, widths and lengths and drape them on tables, behind chairs, around your Christmas tree and across your fireplace mantle.

Tutorial by Wednesday via Green Wedding Shoes


PINE CONE GARLAND


What You’ll Need:

~ Pine Cones
~ Ribbon
~ Screw Hooks
~ Hole Punch
~ Scissors


Instructions:

1. Begin by measuring your mantel or space that you’d like to hang your garland and cut your ribbon. Remember to leave extra for hanging. Once you’ve determined the length, space your pine cones out as you like on a flat surface. The pine cones I used were fairly large so I kept about 4 inches between each one. On the back of the ribbon discreetly mark where each pine cone will go, then punch a hole with a small craft punch. I used an 1/8″ round circle punch like this one.

2. Once you know how many pine cones you’ll need, screw in one screw hook into the top of each pine cone. This takes a little practice and you may need a little elbow grease but once you get the hang of it it goes pretty quickly.

3. Poke each hook through the hole you’ve made in the ribbon and hang! Easy as pie and something that will last for seasons to come!


Tutorial Courtesy of Twig & Thistle

I think this garland would be so fantastic if you sprayed your pine cones with faux white snow like this:


Then you could throw in some mod-70's style plaid . . .

(blanket available from the High Street Market on Etsy)

And you have a very, vintage retro thing happening.  And another rustic beauty . . .


CHRISTMAS TREE BRANCHES

Supplies You Will Need:

~ Branches from the backyard
~ Juniper or other evergreen sprig
~ Drill
~ Glue gun or craft glue

How-to:

1.) Drill small holes into the branches using a 

2.) Add a dollop of glue to the tip of the evergreen sprig

3.) Insert the evergreen into the drilled holes of the branch and there you have it . . . a rustic 'Christmas Tree'.  Go ahead and add a few small ornaments if you like!!

Courtesy of Fresh Home Ideas

And there you have it . . . that ought to keep you busy this weekend.  Have a wonderful one!!


Photobucket

Tuesday, September 27, 2011

Tutorial Tuesday: Birch Bark Cylinders . . .

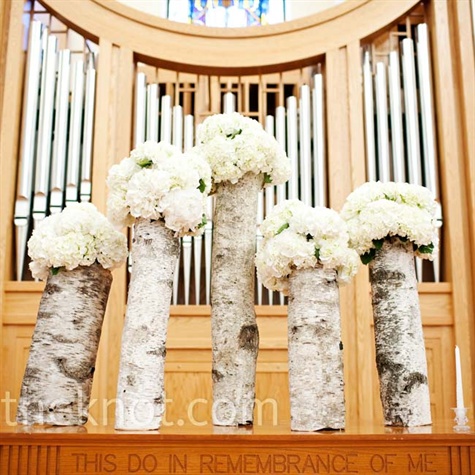
Outdoor weddings are all of the rage and these white birch vases are a great way to infuse a little nature while matching any color scheme you have in mind!  Perfect for a fall wedding or woodland-themed baby shower or birthday party, these gorgeous flower displays are oh-so-chic and more importantly, super friendly on the wallet!  First, let's get inspired . . .


Beautiful, right? Now let's get to work . . .

WHITE BIRCH VASES


Supplies You Will Need:
~ Birch Bark
~ Scissors, box cutter, or utility knife
~ Cylinder Vases (you can even get the right shape at the $ Tree!)
~ Hot Glue Gun
~ Brown Leather Rope, Rafia, or Twine
~ Your choice of flowers

Instructions:
1.Wrap birch around the vase to measure how much you’ll need for each vase leaving about a 2 in seam of bark overlapping. Glue the birch together.


2. Once the birch is wrapped on each vase, cut enough leather rope, twine, or rafia twine to wrap the vase twice and then tie in a knot or bow.


3. After the vases have been complete, add your favorite flowers (we chose a variety of seasonal white and pink blooms). The overall look of the flowers should be airy – make sure to include green accents – our favorite is scented geranium!


(tutorial courtesy of Chesnut NYC)

And aren't they even better if you carve some initials on there (all you need is a woodburning tool!). . .


Flowers not your style?  You could just make a lantern, a unity candle, or napkin rings instead . . .


(these can be found HERE)

Just the right amount of woodsy to bring the outdoors in or to give mother nature a shout out and also an amazing way to complement those feminine flowers with a bit of masculinity!  Hope you are having a wonderful start to your week!
Photobucket

Wednesday, September 7, 2011

Wedding Wednesday! A New Series & A Magical Vintage Garden Party . . .

Here to kick things off for our brand new series of 'Wedding Wednesdays' is the most magical of vintage garden party weddings created by Simply Jessie.  Brought to you via Style Me Pretty, this stunning little rainy day of a garden party paradise is so sweet and so full of personal touches; even the groom designed the wedding invitations, and who doesn't love a savvy groom?

These two lovebirds share a passion for all things outdoors and most importantly...critters!  Just check out how they incorporated all of this into their special day . . .


Hanging tissue poms always do the trick . . .


And look at this magnificent milk glass . . .


Glorious strands of colorful pom garland!


And a memory table . . .


Ahhh, custom designed stationary by the groom himself . . .


Personalized Jones Soda bottles!


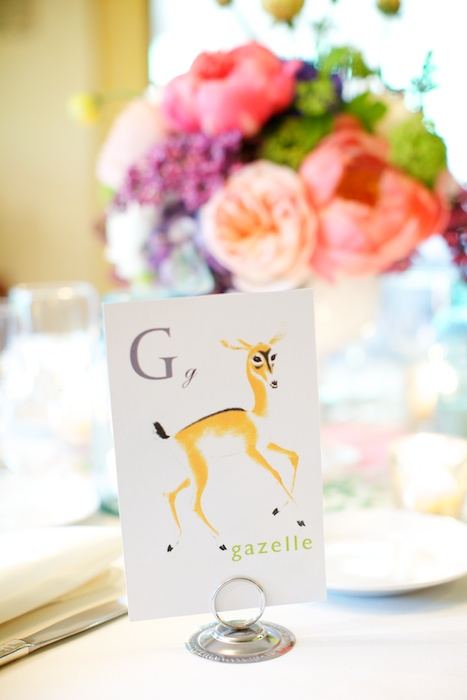
A Word From the Bride . . . Justin and I wanted to have a laid back, magical vintage garden party wedding. We chose our venue because it’s a beautiful nature center and we knew we’d be surrounded by lush trees, green grass, open sky, and…critters! We both have a huge love of animals (it’s what brought us together, when I was helping him with his sick cat), and right from the start we knew animals would play a big role in our wedding (although we couldn’t  bring our cats up to the Grove to join us). Our save the date was a stop motion video starring a painted fox and other animal friends, and Justin designed the invitations to feature two foxes in love. We used small porcelain and ceramic animals for the wedding cake toppers, and vintage animal illustrations as our table markers.


The day of our wedding brought thunderstorms, black skies, and torrential rain! For a little while I kept holding out hope that our ceremony and reception could still be happen outdoors as planned, but we eventually gave up as the rain kept pouring.  We were so lucky to have our amazing friends and family help us get everything ready– there was a table of family photos and vintage animal postcards (in lieu of a guestbook); Jones soda bottles with baby, kid, and engagement pics; a wheatgrass place card holder; poms hanging from the second floor bannister; ribbon wands and numerous other items to set up. We literally could not have set up the ceremony and decorations without our friends and family!


But it was our amazing floral designer, Kelly Marie Uss of Fleur, who transformed the pretty 1920′s house that is the Redfield Estate into the garden party we had wanted.  She transformed the setting into a paradise! As she set up the flowers and centerpieces and beautiful mercury glass urns that flanked the  altar, we were blown away. It was beyond anything we could have imagined, lush and gorgeous and sweet and so perfectly spring. I nearly cried when I saw my bouquet, with passion flower, peonies, tulips, anemones, lilac, tweedia, ranunculus, garden roses, muscari, and more. She used mercury glass votives and urns, milk glass, and blue mason jars filled with votives to give the ceremony and reception a soft glow and beautifully vintage vibe.


The rain stopped just in time for guests to go outside for cocktails and enjoy the gorgeous sunset, and we had an amazing night, filled with so much love and happiness.


Fabulous Vendors:
Ceremony + Reception Venue: The Redfield Estate at the Grove / Floral Design: Fleur Inc. / Wedding Photography: Simply Jessie / Wedding Cakes: Alliance Bakery + Molly’s Cupcakes / Wedding Dress: Giselle by Elizabeth Dye / Bride’s Shoes: Poetic License / Wedding Invitations: The Groom + Letterform (printing)

Photobucket

Wednesday, June 8, 2011

Summer Camp Wedding


As we head into the warm days of summer, I can't help but feel a bit nostalgic about the days gone by, when worries were few and responsibilities were all but nonexistent; when my biggest concern was getting the fray on my newly shorn jean shorts just right.  

I just adore the idea of heading back to those endless days of youth and this 'Summer Camp' themed wedding is the perfect way to rekindle those magical days.  If only for a few hours, you can hear the pine needles crunch underfoot, smell the crackling fire in the air, and be lulled  to sleep by the gentle slapping of waves on the bottom of your wooden canoe . . .

And maybe, just maybe find a summer romance...a first love to gaze at from across the crowded camp cafeteria who could one day, if you are as lucky as Kaylin and Josh, who have one of those unique, once-in-a-lifetime stories, become that special someone who you will spend the rest of your life with . . .


This choice of venue works pretty perfectly with their story–the chapel in the woods is reminiscent of summer camp and these two childhood friends who eventually fell in love will definitely assure you that it doesn't only happen in the movies. . . 


And picture this: a fabulous bunting banner and a sign reading 'Just Married' as the newlyweds & their nearest & dearest pile into an old school bus . . .


And don’t we all know, it doesn’t get better than a summer camp crush? Especially one that you get to keep?  

Partial Photography (Summer Camp Wedding Day) courtesy of Jessica Velarde


Kaylin & Josh's Summer Camp Wedding brought to you by Grey Likes Weddings


Photobucket