If you are not redirected in five seconds, click here.

Showing posts with label paper pinwheels. Show all posts

Wednesday, November 13, 2013

DIY Turkey Snack Tins!


We are just having a ball over here at our house, coming up with fun craft ideas to dress up our holiday table!  This week, we hit up our local $ Tree and found all sorts of odds and ends to keep around for last minute activities to help the little ones stay busy & delight our Thanksgiving guests on the big day too!  

Take a look at how fun & simple these DIY Turkey Snack tins are; you can put them together in minutes and they sure make serving up treats a lot more exciting than your run-of-the-mill bowl!  Just check these out . . .


Supplies You Will Need:

~ Soup can
~ Decorative paper
~ Kraft paper/grocery bag/or Kraft gift bag
~ Glue gun & glue sticks
~ Scissors
~ Double-sided tape
~ Christmas ornament (we used a plastic one from the Dollar Tree)
~ 2 buttons
~ Orange bead (or orange felt)
~ Red ribbon

Directions:


1.) Cover your soup can with decorative paper & affix with double-sided tape.


2.) Cut 3 equal pieces of kraft paper or grocery bag (we used spare kraft gift bags from the Dollar Tree:) into equal squares about 9" x 9.5".


3.) Accordian fold all 3 pieces.


4.) Round the corners.


5.) Fold each of the folded strips of paper in half, adhering them with double-sided tape.


6.) Adhere all three piece together.


7.) Fold your paper pinwheel open, leaving one unattached portion on the bottom.


8.) Cut an oval out of leftover paper and affix it to the front, bottom (above the open portion) of your paper pinwheel.


9.) With your glue gun, attach the scrap circle to the back of the covered soup can.


10.) Cut your decorative paper into equal strips, about 3.5 inches wide and 12 inches long.


11.)  Draw the shape of a turkey feather onto the back of one of the strips.  Stack the paper strips together and cut as many 'feathers' at a time as your scissors can handle.


12.) Arrange your decorative paper feathers into a fan-shape and stick them together with your double-sided tape.


13.) Hot glue the paper feather fan to the back of the paper pinwheel.


14.) Remove the hook clasp on the front of your plastic holiday ornament.


15.) Use the hot glue gun to adhere the ornament to the front of the soup can.


16.) Cut a small piece of ribbon and hot glue it to the front, center of your ornament.


17.) Glue two buttons above the ribbon to make the 'eyes'.


18.) Next, add an orange bead under the button eyes to make the 'nose' (you can cut a small piece of orange felt for a 'nose' if you would rather:)


19.) Fill your soup can with nuts, snacks, jumbo crayons, candy, or whatever your little heart desires and set this little guy out on the table for your Thanksgiving guests to enjoy!


Isn't he just glorious?  Now I know you all are just itching to get to holiday decorating (I can tell from the Pinterest Christmas frenzy!)  But I have a few more Turkey Day crafts & decorations up my sleeve first!  I just love this holiday-all about family, friends, & gratitude; and so many fun possibilities for crafting with the kiddos too!! Photobucket

Saturday, November 9, 2013

Pinwheel Pinecone Turkeys


How about a fun afternoon craft with the kiddos?  You know one of my favorites is the always-gorgeous paper pinwheel....well now you can combine them in all of their splendor with those irresistible little pinecone turkeys.  Use them on your mantel for an eye-popping Thanksgiving Day decoration-or even place them on your dinner table as the sweetest centerpiece or place-card holder.

They're easy & fun, SUPER cheap, and the kiddos love them!  Take a look . . .

Paper Pinwheel Turkeys


Supplies You Will Need:

~ Pinecones (the ones with wide, downward pointing scales work best-but any kind will do)
~ Assorted decorative paper
~ Googly eyes
~ Red ribbon
~ Orange ribbon
~ Double-sided tape
~ Paper cutter (optional)
~ Scissors
~ Glue gun & glue sticks

Directions:


1.) Using you hot glue gun, adhere two googly eyes next to each other on the front of your pinecone.


2.) Cut a small square of orange ribbon.


3.) With your scissors, shape your ribbon into a triangle.


4.) Using your hot glue gun, adhere the base of the triangle underneath the scale of the pinecone where you placed your googly eyes.


5.) Cut a piece of red ribbon, about an inch long.


6.) With your hot glue gun, stick the two tops of the ribbon on either side of the pinecone scale where you placed your googly eyes, trimming it if necessary.


7.)  Cut 3 strips of decorative paper, 12 inches long and 4 inches wide (we used a piece of 12 x 12 piece of paper from Michael's and cut it into thirds).  Accordian-fold all three strips of paper.


8.) With your double-sided tape, adhere all three strips of accordian-folded paper together.


9.) Close the circle with another piece of double-sided tape and stand it up straight like a coffee shop hot drink sleeve.


10.)  Cut a circle out of scrap paper-it doesn't have to be neat, because you won't see it:)  Press the accordion-folded circle down at the center to lie flat on the table, then adhere the paper circle to the center with hot glue.


11.) Cut a 1/4 piece off of the bottom of your paper pinwheel.


12.) Finally, use your hot glue gun to adhere the paper circle on your pinwheel to the back of your pinecone.  Isn't he just the sweetest little thing?


In fact, the whole darn family turned out pretty darn adorable, didn't they?  And they look even better scattered around my fireplace mantel above the Juneberry Lane FREE printable Thanksgiving Day banner! Photobucket

Tuesday, August 27, 2013

Our New PBS Parents 'Birthday Parties' Series - DANIEL TIGER!!!!!

So happy and excited over here with the debut of our new 'Birthday Parties' series over at PBS Parents.  We kicked things off with a 'Daniel Tiger' birthday party and throughout the course of the next few weeks will be bringing you video inspiration (at last) for your little one's GRR-IFIC birthday party!


For more pictures of this party, as well as tutorials & all of the free printables to go along with this theme, go here: http://www.pbs.org/parents/birthday-parties/daniel-tiger-birthday-party/

And follow this link to our first video (a new one will air every Tuesday) where you can find yourself some simple little tutorials on how to throw a party like this one!


Finally, visit the PBS Parents Website for a whole bunch more party inspiration, tricks, tips, & tutorials!  Next up, a Thomas & friends (you know, that cheeky little engine:) party that is sure to be a favorite with all of your train-loving little guys & gals.  I can't wait for you to see everything we have in store for you!! Photobucket

Thursday, August 18, 2011

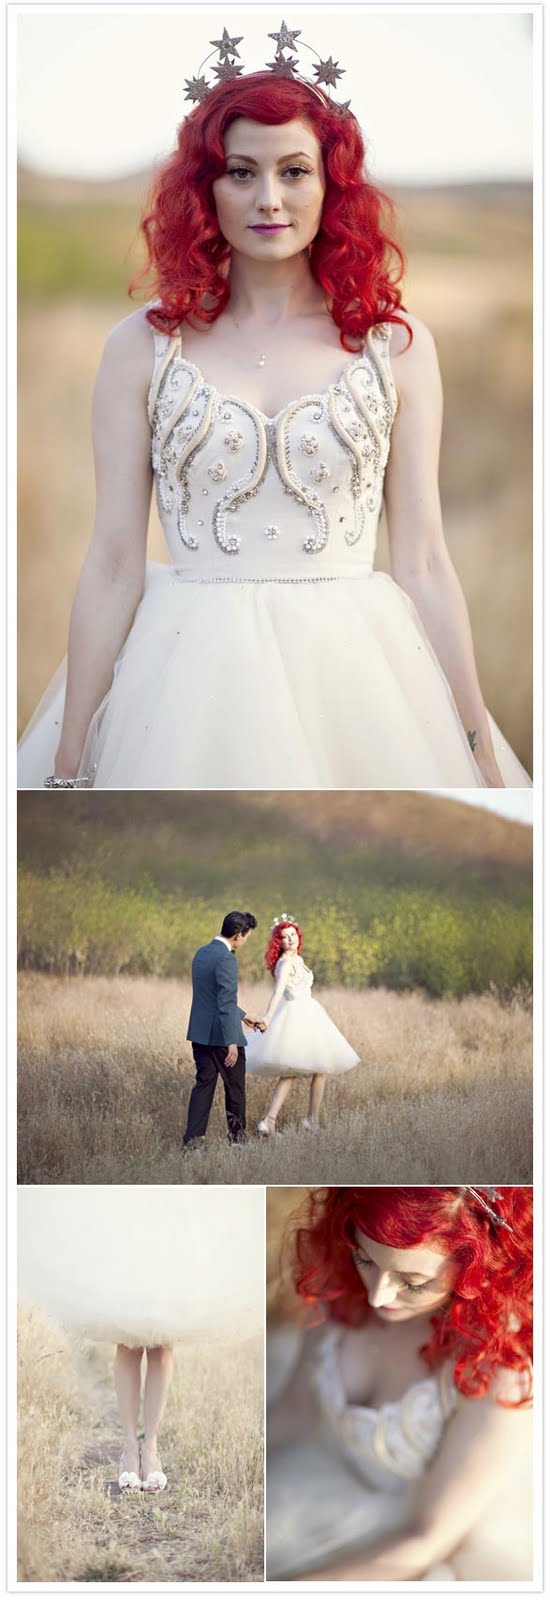
Kooky & Colorful: A Southern California 1950s-Inspired Wedding . . .

So, when it comes to weddings, sure, I am all about class, timeless details, simple elegance.  But I have to admit, I just love when a couple surprises you with something so out of the ordinary, fun, & unexpected that they knock your socks off, and that is exactly what Dominique & Ron, the talented photography duo behind Love Me Sailor, have done with their retro 50's-inspired wedding in Southern California.

And all of this fab on a mere $11,000 budget!  Just see for yourself, but remember, expect the unexpected . . .


(Did you happen to spot those gorgeous glitter letters again?)


I just love that headpiece . . .


Are those our paper pinwheels I see?


I am just loving these 50's housewife-inspired bridesmaid's dresses . . .


Now it should come as no surprise that Ron and the bridal parties walked in to “Chapel of Love” by the Dixie Cups and Dominique walked in to the hauntingly dreamy and romantic  ”Sleepwalk”, by Santo and Johnny . . .


A word from the bride about her awesome DIY headpiece: "I would have to say my favorite project, and probably the most difficult and time consuming was my star headpiece I made for the reception. I was inspired originally from Hedy Lamarr’s costume headpiece in the 1941 film, Ziegfield Girl, and more recently inspired by a headpiece by Stephan Jones. "

(Hedy Lamar - Ziegfield Girl circa. 1941)

(Stephen Jones for the 2011 Dior couture collection)

"I made it completely on my own and took me close to 30 hours over the course of 3 weeks to make. I wasn’t sure how it was going to turn out in the end, but I was so incredibly happy with the results!"


All sorts of kitschy fun . . .


How about those 'old movie star' paper dolls for the escort cards?  And why not throw in a vintage glittery doll flower vase while you're at it . . .


And you know everyone who comes to California has to have them some 'In-N-Out' . . .


All of that color, all of that kooky; even if quirky isn't your style, you know you want to be guest at a wedding like that!  Simply unforgettable, no?  

Thank you to 100 Layer Cake for leading us to this funky & offbeat rockin' good time of a wedding and to these fabulous vendors:
Photography: Joielala Photographie / Event and floral design: Mr. Caballero Creative / Bride’s dress: Vintage & re-design by Daniela Kurrle Couture / Bride’s shoes: Badgley Mischka / Bracelet & earrings: Vintage / Necklace: Gift from Groom / Hair: Danny Rishoff / Makeup:  Joyce Bonelli / Groom’s suit & bowtie: Vintage / Groom’s shoes: Re-mix Vintage reproductions / Bride & Groom flowers: The English Garden / Catering: Appetizers, cakes & bar: Whoa Nelly! Catering / Dinner: In N Out truck & Ricky’s Fish Tacos (from Silver Lake in Los Angeles) / Rings: All vintage – Bride’s band was her grandma’s & Groom’s ring is from Claude Morady Beverly Hills / Kettle Corn: Diego’s Kettle Corn (805) 512-2260 / Rentals: Ace Party Rentals
Photobucket