If you are not redirected in five seconds, click here.

Showing posts with label 1950s wedding. Show all posts

Tuesday, August 23, 2011

Tutorial Tuesday: Terrific Treat Cones!


Looking for a cute & budget-friendly way to hand out treats at your next event, or send your guests off with a tasty 'thank you' for the ride home?  Well, look no further, because these oh-so-simple treat cones are the perfect way to add a bit of fancy to your dessert table without putting a dent in your wallet.  And even better, you can whip them up on your own in a matter of minutes using these easy instructions.

But first, a little inspiration . . .


How absolutely adorable are these sweet little cones in bales of hay?


And why not make them into carrots, I mean, you know shape-wise it works like a dream. . .


And yes, it is a bit early, but I know you, my crafty-minded divas, and you know you have already started dreaming ahead to Halloween . . .


Who says you have to stick with candy?


And my absolute favorite, the Candy Corn-shaped Cone!  


Okay, now back to business!  Here's how it's done:


Supplies You Will Need:

~ decorative paper (size 12 x 12 inch scrapbook paper or card stock, whatever you prefer)
~ scissors
~ 4" scotch tape
~ 4" transparent tape
~ pencil

Directions:

1.) Print your template here: treat cone template
(this template makes a 5 inch cone, the perfect size for little hands and single servings of treats)


2.) Using your pencil, trace 4 cones onto your 12 x 12 inch decorative paper or card stock


3.) Cut out your treat cones and place them side by side in an assembly line.


4.) Grab a cone and overlap the two ends like the picture above.  I made sure that the edges were even and smooth at the top of the cone.  You should have a slight gap at the bottom, which is supposed to be there.  You can even insert lollipop sticks (found at Jo Anne's or Michael's) if you want to recreate something like in the bale of hay display as seen in the inspiration pictures above.  


5.) Place a 4 inch piece of scotch tape in the inside and press it so it lays smooth like the picture above.


6.) Then, place a 4 inch piece of transparent tape on the remaining flap of paper on the outside of the cone.  Press both pieces of tape down, making sure that they are holding well.  


7.) Last up, fill your treat cones with the snacks of your choice and enjoy all the prettiness that they add to your next party!! 

And if you have a crafty husband at home who you want to put to work as well, or maybe you just like to do a bit of woodworking yourself on the weekends, you can find the directions to make this fabulous little treat cone holder HERE
 
Treat Cone & Stand Tutorial Courtesy of Smashing Peas and Carrots
Photobucket

Thursday, August 18, 2011

Kooky & Colorful: A Southern California 1950s-Inspired Wedding . . .

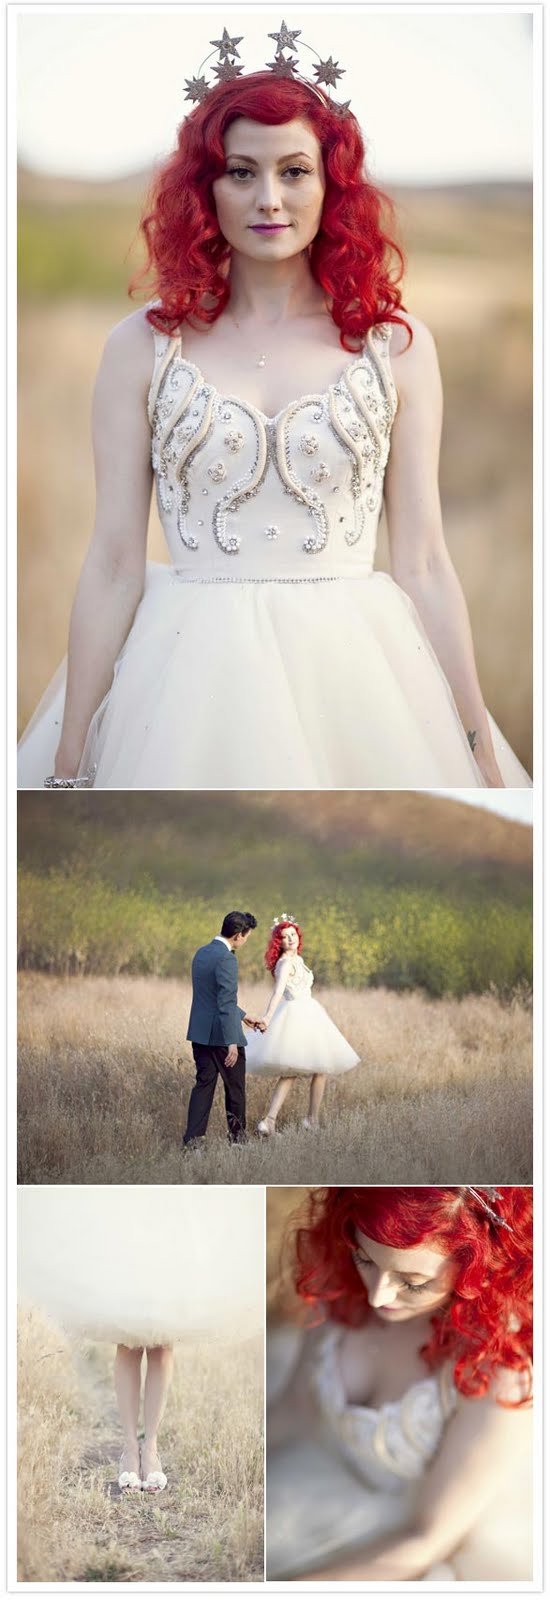
So, when it comes to weddings, sure, I am all about class, timeless details, simple elegance.  But I have to admit, I just love when a couple surprises you with something so out of the ordinary, fun, & unexpected that they knock your socks off, and that is exactly what Dominique & Ron, the talented photography duo behind Love Me Sailor, have done with their retro 50's-inspired wedding in Southern California.

And all of this fab on a mere $11,000 budget!  Just see for yourself, but remember, expect the unexpected . . .


(Did you happen to spot those gorgeous glitter letters again?)


I just love that headpiece . . .


Are those our paper pinwheels I see?


I am just loving these 50's housewife-inspired bridesmaid's dresses . . .


Now it should come as no surprise that Ron and the bridal parties walked in to “Chapel of Love” by the Dixie Cups and Dominique walked in to the hauntingly dreamy and romantic  ”Sleepwalk”, by Santo and Johnny . . .


A word from the bride about her awesome DIY headpiece: "I would have to say my favorite project, and probably the most difficult and time consuming was my star headpiece I made for the reception. I was inspired originally from Hedy Lamarr’s costume headpiece in the 1941 film, Ziegfield Girl, and more recently inspired by a headpiece by Stephan Jones. "

(Hedy Lamar - Ziegfield Girl circa. 1941)

(Stephen Jones for the 2011 Dior couture collection)

"I made it completely on my own and took me close to 30 hours over the course of 3 weeks to make. I wasn’t sure how it was going to turn out in the end, but I was so incredibly happy with the results!"


All sorts of kitschy fun . . .


How about those 'old movie star' paper dolls for the escort cards?  And why not throw in a vintage glittery doll flower vase while you're at it . . .


And you know everyone who comes to California has to have them some 'In-N-Out' . . .


All of that color, all of that kooky; even if quirky isn't your style, you know you want to be guest at a wedding like that!  Simply unforgettable, no?  

Thank you to 100 Layer Cake for leading us to this funky & offbeat rockin' good time of a wedding and to these fabulous vendors:
Photography: Joielala Photographie / Event and floral design: Mr. Caballero Creative / Bride’s dress: Vintage & re-design by Daniela Kurrle Couture / Bride’s shoes: Badgley Mischka / Bracelet & earrings: Vintage / Necklace: Gift from Groom / Hair: Danny Rishoff / Makeup:  Joyce Bonelli / Groom’s suit & bowtie: Vintage / Groom’s shoes: Re-mix Vintage reproductions / Bride & Groom flowers: The English Garden / Catering: Appetizers, cakes & bar: Whoa Nelly! Catering / Dinner: In N Out truck & Ricky’s Fish Tacos (from Silver Lake in Los Angeles) / Rings: All vintage – Bride’s band was her grandma’s & Groom’s ring is from Claude Morady Beverly Hills / Kettle Corn: Diego’s Kettle Corn (805) 512-2260 / Rentals: Ace Party Rentals
Photobucket