The tutorial we are featuring today comes straight from a bride who truly 'took the cake' with her most amazing DIY masterpiece of a wedding, Miss Elsie Larson (of the indie fashion/craft blog A Beautiful Mess - remember the fabulous sister duo with the Red Velvet vintage & bake shop?).
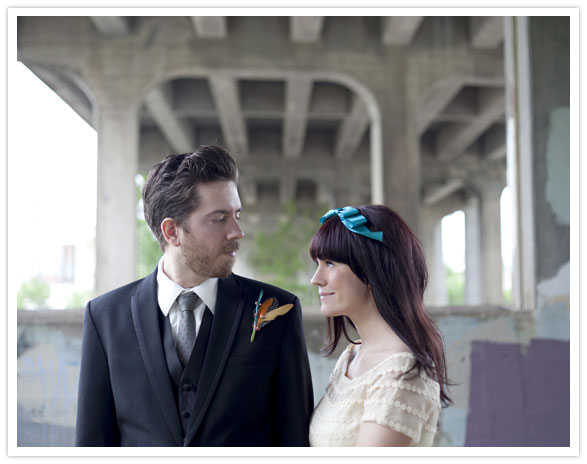
What a wild celebration of fun, madness, color, craft, and just plain crazy coolness! The 'theme' of this wedding is 'Birds of a Feather, Flock Together', and when you see the pictures below, you will completely understand why! Then keep on reading for some fantastic little tutorials from the bride herself.
First, the wedding . . .
There are so many more wonderful details in this video that you absolutely cannot miss . . .
And the tutorials, in Elsie's words . . .
'Hello there Cakelets! I’m Elsie from A Beautiful Mess. I recently planned my own DIY wedding and wanted to share a few things with you. When my fiance and I were planning our big day we chose not to hire a florist.
Not only did it save us hundreds (if not thousands) of dollars, but making my own corsages, boutonnieres and bouquets is one of my happiest wedding memories! We ended up with pieces that were really special to us and better reflected our personality than something we could have ordered at a flower shop!'
DIY Feather Boutonniere:
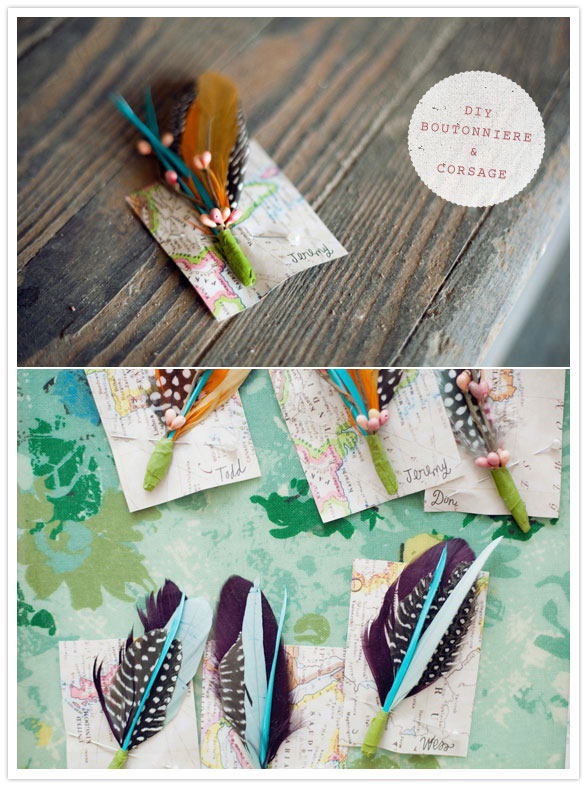
'Here's what you do:
Step 1: Choose feathers and accent pieces in your colors. I used some berry garland too. I ordered most of my supplies from Etsy.com.
Step 2: Gather the pieces and arrange them exactly how you want them to look on your boutonniere.
Step 3: Using floral tape (or deco or twill tape) bind your feathers together at the base. Be sure they are all secure in the adhesive and will not slip out!
Step 4: You’re done. Just use a floral pin to pin your boutonniere to a piece of paper (this way you can also label who the different boutonnieres are for). Go get yourself a treat or have a fancy dinner with your fiancè because you just saved yourself a bundle!
Making our own feather and floral pieces was one of the easiest DIY’s we chose to do! I highly recommend it and it’s a project that can be done months in advance, which is always nice!'
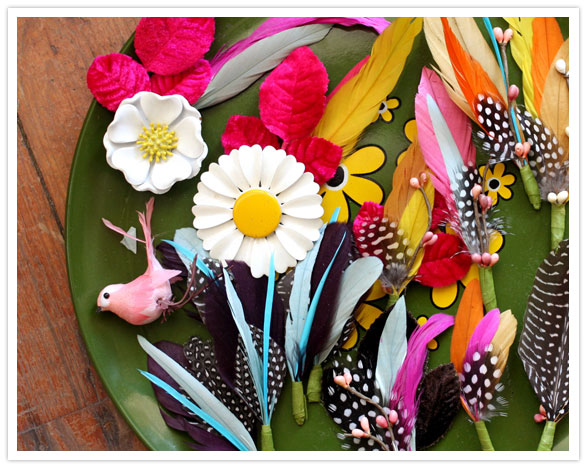
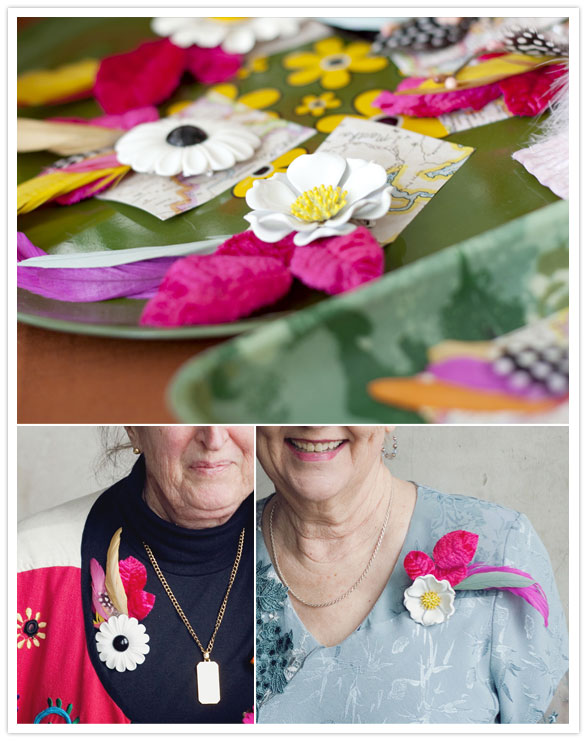
DIY Vintage Brooch Corsage:
'I own a vintage boutique and we have these pretty enamel floral brooches from the 1960s sitting around everywhere. I thought it would be fun to dress them up as a special corsage for our grandmothers to wear!
Step 1: Collect flowers, berry garland and millenary leaves in your colors. I ordered most of mine from Etsy.com.
Step 2: Choose pieces to accent your brooch. Trim the pieces to about 4 inches.
Step 3: Glue the feathers and findings to the back of your brooch. I used glue dots.
Step 4: Cover the back of your feathers with some twill tape or deco tape. They are already firmly attached with the glue dots, but this just makes the back look a little bit more polished.'
DIY Wedding Bouquets from Elsie:

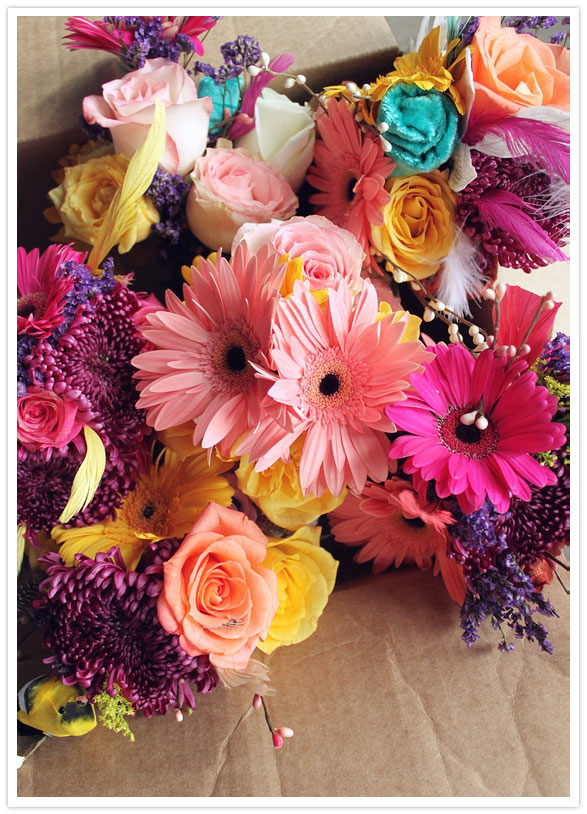
'Hi Cakelets!
When I was younger I worked at a flower shop. Thinking back to that experience, I knew that bouquet making was fun and easy so I decided to make my own wedding bouquet while also letting my bridesmaids make theirs too! We got together after the rehearsal dinner, laid out a bucket full of mixed flowers and things I’d collected and had such a fun time creating our own bouquets!
I loved how each turned out – super unique and special. I was a huge fan of Holly’s bird charm and Katie’s berry twigs and feathers.'

'Step 1: Collect Supplies. For my wedding bouquets I used fresh flowers, handmade velvet flowers, berry twigs, feather birds, feathers and vintage brooches. I also used some family heirloom ribbon (vintage tatting) and velvet ribbon that I found the first month we were dating! Choose accents that are personal to you!
Step 2: Start from the center and build the floral base of your bouquet. Work your way out by adding more and more flowers.
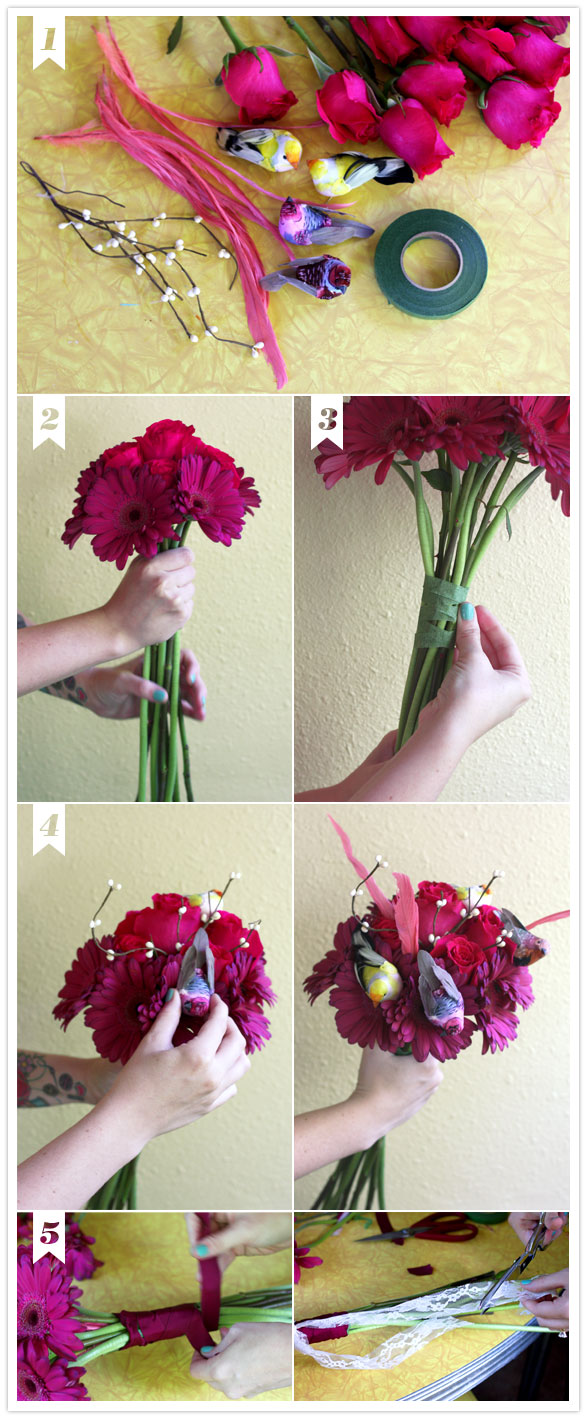
Step 3: Wrap the stems with floral tape. Use as much as you need to make it feel secure. The floral tape should go where ever you plan to wrap the ribbon. The ribbon will eventually hide it completely!
Step 4: Add accent piece such as feather birds (they have wires underneath that can secure them onto blooms) or feathers.
Step 5: Wrap the base of your stems (over the floral tape) with a pretty ribbon. I also tied some lace on mine as an accent.
Have fun making your bouquet! Tip: If you’re planning to take bridal portraits, use that to practice making your bouquet.'
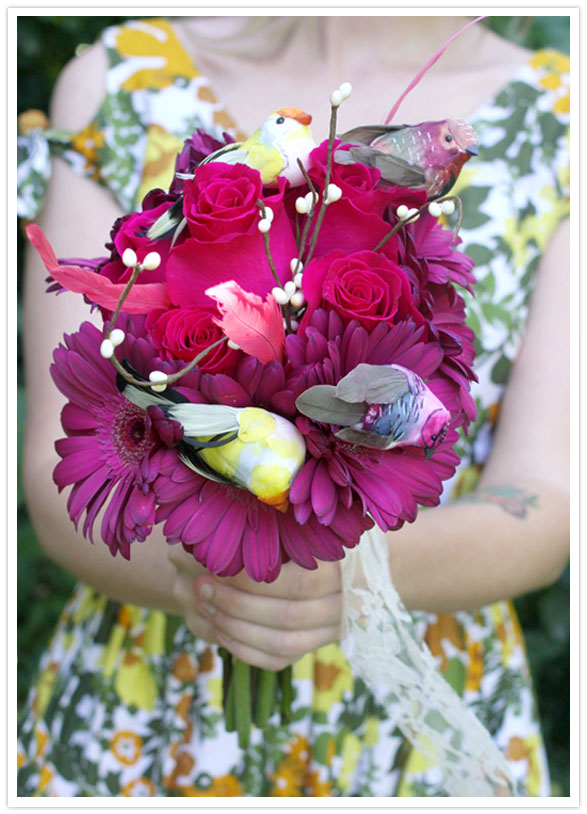
Have fun! xo-Elsie
Simply delightful, no?!
Pictures & Tutorials courtesy of:
100 Layer Cake
Style Me Pretty
A Beautiful Mess



No comments:
Post a Comment