If you are not redirected in five seconds, click here.

Showing posts with label tutorial DIY. Show all posts

Wednesday, June 29, 2011

Sofia's Rainbow & Pinwheel Party (with Juneberry Lane Printables, hooray!)

Since we are on the subject of pinwheels as of late, a few weeks ago we did a custom order for the most fabulous mommy . . . Cam Cooper & her adorable daughter Miss Sofia, and I wanted to give you a look at how wonderful the party turned out!

I just adore all of the handmade elements that Cam added into the decor...perhaps you will spot a few lovelies from tutorials past and it makes me oh-so-proud to see Juneberry Lane Custom Printables in action!  See for yourself what an amazing job she did with this fancy little Pinwheels & Rainbows party . . .


Colorful cake pops with our custom labels . . .


Candy Jar Labels for some sweet snacks . . .


Remember our lovely hand-dyed lace doilies?


Custom Pinwheel Straw Flags . . .


Ushering the guests in with style . . .


The gorgeous mommy & baby girl . . .


Miss Sofia in action . . .


The proud parents (amongst some pretty tissue hanging poms:)


Let them eat cake!


Thank you to the lovely Cam & Sofia for sharing their special day with us!

Have a party coming up and looking for your own set of printables?  Just visit our Etsy shop and send me a message and we'll get started designing your very own line of custom party supplies . . .

Photobucket

Tuesday, March 22, 2011

Tutorial Tuesday: Vintage Tea Tin Magnets...


Difficulty Level: Easy
Since we were all about repurposing vintage tins yesterday, I thought this clever idea from Creature Comforts would be perfect for today's DIY tutorial and a great way to organize your kitchen and keep pencils & pens within arms reach when you need to jot down a quick reminder, recipe, or to-do list.  


You will need:

~ Small tins (tea tins, mint tins, and candy tins are perfect).  Tins that open at the top will be best for pencils, while tins with lids will work well for small doodads such as sewing pins).

~ Super strong magnets (found at Michael's or other major craft stores).  You can probably find similar magnets at hardware and office supply stores.


1.) Place a minimum of two super strong magnets on your fridge or any metal surface you would like to use.  A metal knife rack (for instance) can be used in your craft room to hold scissors, and tins filled with pins + notions.
2.) Take your tin of choice and attach it to the magnets.  No gluing needed.  The magnet with hold it in place for as long as you'd like.

That's it!  Fill with pencils, or whatever odds and ends you'd like and enjoy! Photobucket

Monday, March 21, 2011

Vintage Tea Tins...


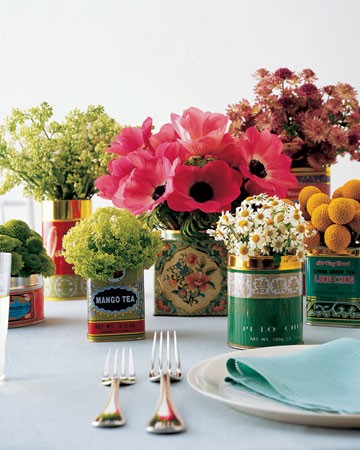
I just love these charming tea tin vases and candles for Spring, repurposed from vintage tea tins and cans.  What a chic & cheap idea for gorgeous flower vases and centerpieces for your vintage inspired party or shower...or just a lovely way to decorate your tabletop or start an herb garden on your windowsill in happy anticipation of Spring...


Photobucket

Tuesday, March 8, 2011

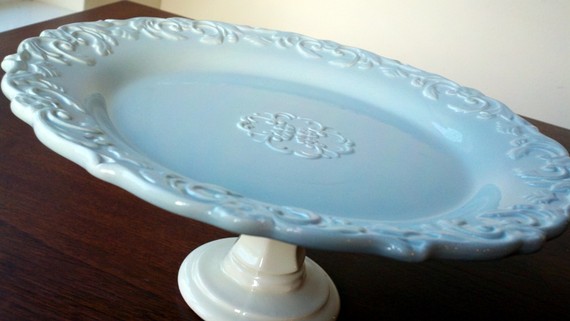
Tutorial Tuesday: Make Your Own Vintage Inspired Cake Stand...


Supplies you will need:


~ Large dinner plate or platter
  * the base of the plate should be flat & level.

~ Base (try candle tiers, bowls, on-the-rocks glassware) 
  * make sure your base is heavy enough to support the weight of the plate or platter!

~ E6000 Glue (found at Michael's, Jo Anne Fabrics, or other major craft retailers) 

The wonderful thing about making your own cake stand is that you have the freedom to choose the pieces that work best with the serving dishes you already have stocked in your kitchen.  I find the best place to discover vintage inspired designs for a fraction of the price are stores like TJ Maxx, Marshalls, & Ross.

You can purchase single plates & platters for around $5.99 and their selection is constantly changing!   If you really enjoy the search for one-of-a-kind parts, don't forget to scour rummage sales, flea markets, garage sales, or second hand stores! 

DIRECTIONS:  

1.)  Lay the plate down on a flat surface protected with paper.
2.)  Carefully run a bead of E6000 Craft glue around the top rim of the base unit.


3.)  Flip the base over and place it in the center of the bottom of the plate.  Place a book over the bottom of the base to help set the two pieces together firmly.


4.)  Allow the pedestal to dry overnight. When the glue has set, hand wash and dry. Add your dessert and your pedestal dessert plate is ready to enjoy!


  • Photobucket