If you are not redirected in five seconds, click here.

Showing posts with label toddler meals. Show all posts

Monday, February 11, 2013

Countdown to Valentine's Day! 4 . . .


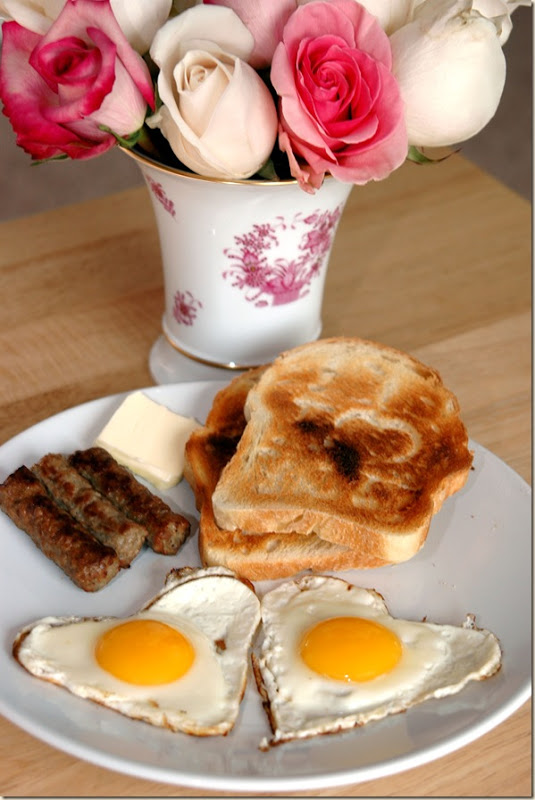
I just love the thought of surprising your family with a delightful breakfast on the morning of the big day.

And yes, most of us are pressed for time in the race to get everyone out the door for work and school (ha ha, I can say that now), but that doesn't mean you can't throw together one of these lovely little meals to fill everyone's bellies and hearts with love:)

Take a look at a bit of inspiration . . .


BACON!!


And the winner of the best Valentine's Day breakfast EVER goes to . . .


Best yet, it isn't even that difficult to pull off!  Check it out:

Conversation Heart Toast
(courtesy of Hungry Happenings)


Ingredients:

~ 2 slices thick white bread per person
~ 1-2 tablespoons milk per color
~ primary and neon food coloring

Special Equipment Needed:

~ heart shaped cookie cutter
~ pastry brushes
~ food safe paint brushes (either brushes that are only used for food or brand new paint brushes)


Directions:


1.) Use a heart shaped cookie cutter to cut hearts out of each slice of bread. Pour 1-2 tablespoons milk into a small bowl, ramekin, or glass.  Squeeze in 1 drop of food coloring and stir.  Add more drops of food coloring until you acheive the desired color.  Create as many different colors as you desire.  The neon food coloring works great for these hearts. Use a pastry brush to very lightly brush the colored milk all over one side of each of the heart shaped bread slices.  Be careful not to oversaturate the bread or your toast will not get very crisp.


2.) Pour 1-2 tablespoons milk into a small bowl and add 3 drops red food coloring.  Add more drops of coloring until you achieve the desired shade of red.  Use a fine tip paintbrush to write messages on each of your hearts.  The color will bleed if you have too much colored milk on your brush, so shake off excess colored milk before you paint your bread.  When you have finished decorating your hearts, toast them in a toaster or toaster oven.  You can also place them on a baking sheet and set them under a broiler set at low heat.  Broil for 2-3 minutes on each side until golden brown. Keep an eye on them as they can burn easily.  Serve your toast with your favorite spreads or create a conversation heart sandwich.


It just doesn't get more adorable than that!  How can you not have the best day ever after starting it off like that?!? Photobucket

Wednesday, January 23, 2013

Juneberry Baby: Wee Little Wednesday!!


So as some of you may know, my sweet little boy is starting Preschool next Tuesday!!  I have such a mixture of emotions running through me as we get everything prepped for his first big day...I am nervous and hopeful that he will manage to behave himself and not get thrown out, I am excited for all of the little fun things that go along with the education journey ahead (his first pictures NEXT MONTH!!), and I am anxious to see how he handles the thought of us dropping him off and leaving for a few hours!

Well what's a mom to do when her nerves are getting the better of her?  Turn the mundane into something marvelous, that's what!  After doing a little research on what some of you awesome moms & dads are finding success with at lunchtime, I discovered the ridiculously amazing art of BENTO MAKING...and I have to admit, I am hooked!!

I know this idea is nothing new and the trend has been going on for several years now, but it is new to me and so I want to share my own (very new!) experiences.  Take a look . . .


BENTO-MAKING BASICS

Supplies you will Need:
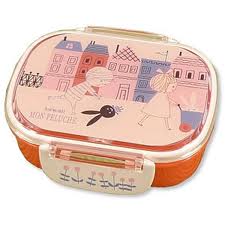
~ a bento box! (see a bit of inspiration below)
~ cookie cutters (in whatever shapes your little one loves:)
~ silicone muffin liners
~ FOOD!!

Aren't these full-sandwich 'Lunch Punch' cutters adorable?


I wanted to start simple and not have to order online, so I picked up this transportation set of cutters from Michael's by Wilton . . .


Boxes I love:

I am waiting on the blue version of this 'Thinkbaby' version below.  I thought we would start off with something standard, leak-proof, and easy to switch it up with an adult lunch in case the Bento-making isn't quite as well received as I hope:)

They have quite a few fab color options too...and I love the stainless steel & airtight lid!


And once things get rolling I know I am going to have to pick up one of these amazing numbers by my favorite Bento box designer, Shinzi Katoh...


Some further inspiration, in case you want to go totally insane:


I was able to get two sandwich pieces out of the cutters I picked up from Wilton with very little extras (just enough for a bite-sized snack for the dog:)  But in case you don't have a hungry mutt lurking around, you can always do this . . .


So I am still waiting on my Bento box to arrive, but in the meantime I tested out a few of the cutters today and I have to say...


He inspects the goods . . .


Going in . . .


YES!!


It was a hit!!

And next week, while I am sitting around pacing the floor and worrying about how things are going, at least I know there will be a little bit of delight in my guy's big day and that is definitely helping ease my mind:)  I can't wait to delve further into this fun!! Photobucket