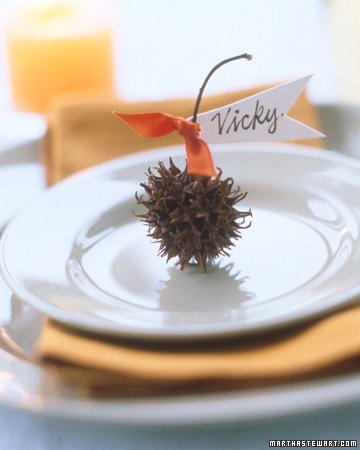
What's great about Thanksgiving is that you really don't need too much to really spice up the details. A pretty mantel, a gorgeous table runner, a fab centerpiece, and sweet little place cards like these and you will be all set!
What I love about pre-planned seating is that you can make sure none of your guests have to worry about where they should sit; no one has to spend a second thinking about whether a couple wants to sit next to each other or a child next to a parent!
Now don't worry, I know you are busy getting all of those last minute groceries and stressing out about what time to put the bird in the oven, so I am making sure to keep it simple with a fun project to add some rustic glam to your table, with very minimal fuss.
But first, some inspiration of course! Pinecones are easy to find and always a hit . . .
Even more so when you add glitter, of course . . .
Feathers are ALL the rage this season . . .
And a pumpkin three ways!
These little buggers make me so angry when I am out taking my son for a walk in his stroller, so getting some use out of them instead of just getting them caught in the wheels makes them somewhat bearable . . .
Simple not your thing? Okay, go ahead and get a little crafty . . .
Or scale it back, find a pretty leaf and use a paint marker; easy-peasy and still elegant & beautiful . . .
Paper leaves will do the trick too . . .
Now that you are feeling totally convinced that you absolutely cannot have another dinner party without place cards, let's get to the DIY business! Thanks to
eab designs, we have this sweet little leaf tutorial . . . and even a free leaf template so you don't have to rely on your drawing skills! Here's what you do . . .
PAPER LEAF PLACE CARDS
Supplies you will need:
~ heavy paper in whatever color you prefer (the above pic is 67 lb card stock in cream)
~ scissors
~ chalk ink (optional, but it makes the gorgeous 'burned' edge look-or you can actually burn the edges if you trust yourself with the matches. Be careful & go outside:)
~ bone folder (optional-it scores the leaf and gives it that three dimensional look. You can buy these for very cheap at Michael's or your local craft store, but if you don't have time, just use anything you have without a sharp edge - like the back of a butter knife or the rounded side of a pen or paintbrush.)
~ marker
~acorns, pears, or pinecones and twine (optional-if you want to tie your leaves to something rustic)
Directions (from eab designs)
1.) Print out the template on card stock (I used 67 lb paper in cream), and then cut out each leaf.
You can find your free leaf template
HERE
I have two great tips for cutting intricate curves. The first is to maneuver the paper as you cut, not the scissors. Secondly, a small pair of scissors will be your best friend. I love these curved ones from Fiskars. They are available at Michael's for under $10 and I use mine all the time.
2.) After I cut the leaves out, I add my guests' names and then dab chalk ink on the edges to give them a bit of color. For a more three dimensional effect, I score the center using a bone folder and straight edge. Gently fold the crease toward the center of the leaf and with your fingers curl up the edges slightly here and there.
3.) Your guests' names can be added by freehand, or you can open the template in photoshop, or another software program, and add the names there using the font of your choice.
The leaves can be used alone, or tied to a fall decoration. Above I've used felted acorns and jute twine. Pine cones, walnuts or a fresh pear would also be nice. You can even rest them on top of a wine glass.
As usual, its the little details that steal the show; and the best part about most of these place card ideas is that you can get the kids out of your holiday-planning hair for a bit by sending them off on a backyard treasure hunt for your supplies!!!


